Sourdough Revival


I have seen a lot of folks looking for sourdough starter cultures in the last while and I decided to post about how to revive a dried culture here as I have been mailing out some to folks who do not have one to start with – these directions will come in handy.

If you’re looking for a kombucha, ginger beer or sourdough starter ~ I could be your guy. Send me an email or post a comment on this blog and I’ll be more the happy to help you out.

What you have to know is that reviving a dried sourdough starter can be a pretty bulletproof and simple task – most of the time. Like all cultures that go dormant however, you do not know if they are “alive” again until you go through the process to wake them up. Some have gone to sleep forever and you need to start all over again. No big deal – just let me know and I can ship you out another.

Day 1 Instructions: 

Soak 1 tsp. dried starter in 1 Tbs. lukewarm purified or spring water for a few minutes to soften

Stir in 1 Tbsp. all-purpose or bread flour (orgainc), cover loosely with a tightly woven cloth or Abeego wax/cloth wrap and let sit at 20 degrees (plus) for 24 hours. If you stir the mixture a couple of times during the 24 hours you will aerate and push the process along a little further.

Day 2: 

Stir in 1 Tbsp. of flour and 1 tsp. of purified water and let it sit as in day 1. Bubbling should start within 48 to 72 hours of this process. If not, your culture might be stagnant. Try again.

Day 3: 

Add 1/3 cup flour and 1/4 cup of water to activate culture.  Build the starter one or two times per day until you have what you will need for baking – remembering you will need to keep some to set aside for future batches. Equal amounts (by weight) of flour and water usually give you the best culture consistency for baking.

Aftercare: 

Your starter can be stored in the fridge with a loose fitting lid or Abeego. You can then feed it once weekly to keep it alive. You may also go the route of drying your culture out on a silpat if you feel that you are done with baking.

Spring (10 minute) veggie soup 


Tired of salad, still on a training plan…enter Zuppa.

Yesterday felt cold, really cold and blustery. I think that during this point of my training, when I’m burning off all my body fat, I just tend to be more cold. Plus, we live in the woods in the foothills of the Canadian Rockies so….we still have knee-deep snow in places that I’m sure adds to this fact.

This soup wasn’t as satiating as I would normally make it because I had measured my protein and placed it in the bottom of the bowl instead of just going for it like i usually would. If you’re watching calories, this one is very very low on carbs, good amount of fiber and if you measure out your protein, it’ll balance out quite well for an evening meal.

In the bottom of this bowl is 4oz of firm organic Tofu. In Jeff’s bowl was 6oz of Tofurky Lightly Seasoned “Chicken”. So jealous of his “meat”…hee hee.

Ingredients: 

4 cups veggie stock – try my homemade recipe HERE

2 cups hot water

2 medium carrots chopped

2 cups cauliflower chopped

2 cups broccoli chopped

1 medium yellow onion diced

3 cloves garlic diced

3 cups white mushrooms sliced

1 cup shelled peas

1 heaping TBSP Mugi Miso

Coconut oil (spray) or 1/2 tsp

1 tsp salt

** I use sriracha on EVERYTHING including this soup. Add to your desired heat.

Method: 

In a large pot saute onions, garlic and carrots in coconut oil for 5 minutes on medium heat to soften and release flavour.

Next, add in cauliflower and broccoli and saute for another 3-4 minutes.

Add remainder of ingredients starting with your veggie broth then your water. Bring to a boil for 1 minute then reduce and simmer for 30 minutes or so.

You can either add protein directly to the soup OR place it in the bottom of a bowl before serving. If you do this when your protein is cold, it will cool off the soup while heating up.

Serves 4.

Mustard vinaigrette 


You may be getting sick of salads but I bet you that’s because your dressings are boring or your toppings haven’t changed.

Add a spark (and definitely a zing) to your next dinner/lunch salad with this little ditty.

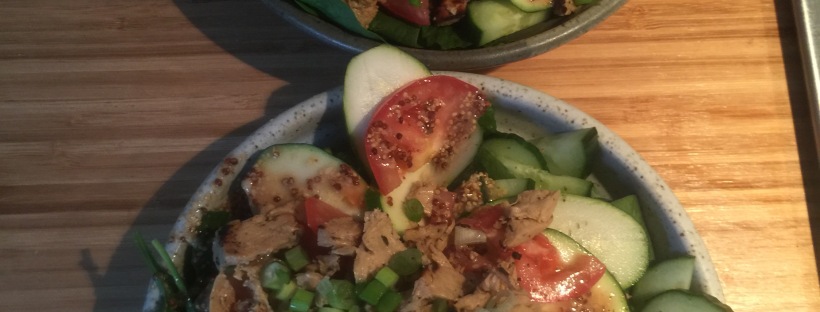
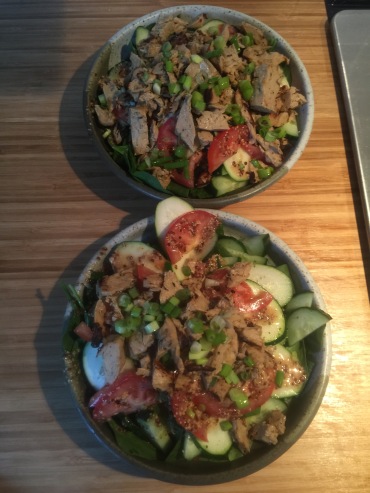
Veggies in here included sliced zukes, cukes, kale, romaine, spinach, green onion, tomato and the Tofurky Lightly Seasoned Chicken product.

Ingredients: 
2 tbsp grainy German mustard

2 tbsp red wine vinegar

1 tbsp chickpea miso

1/8 cup water

1/2 tsp freshly cracked pepper

Method: 

Whisk all ingredients together with a fork and drizzle over salad. Works well with hot protein as well as cold.

No peanut satay 

I drummed this recipe up while I was wondering what to do for yet ANOTHER dinner salad. In our house, most of the time but definitely during prep season our last meal of the day is a salad. We harness the most beneficial nutrients of all of the raw vegetable ingredients simply by not cooking them at all.

Flavours are crisp, clean and robust every time.

For this particular salad I was craving something a little Thai but didn’t want to use peanut butter as I have that as a staple at least a couple of times per day. I also wanted to avoid peanut butter so that this recipe could be accessed by folks who may have moderate to severe nut allergies.

The flavours at the end of the day are not 100% Thai Peanut sauce (obviously) but are a great second runner up in my books.

The bowl itself contained snap peas, spiralized zucchini noodles, red peppers and mushrooms. Macro-nutrient wise dinner was still on point for prep.

Ingredients: 

1 tablespoon Mugi miso

3 tablespoons Sun Butter

1/4 – 1/2 teaspoon  hot pepper oil (this stuff is HOT so choose your own adventure)

3 tbsp hot water – add as needed to create smooth consistency

2 cloves raw garlic

1/4 tablespoon coconut manna / coconut butter

Method: 

Place all ingredients in wide mouth mason jar & blend with hand blender.

If you do not own a hand blender then simply ensure that you utilize a garlic press or dice the hell out of your garlic to ensure it’s all mixed up nicely.

I topped a great hot salad which included some new lightly seasoned Tofurky for a vegan protein option.

Nutritional Info: 

Nutrition Facts
Servings 4.0
Amount Per Serving
calories 317
% Daily Value *
Total Fat 8 g 12 %
Saturated Fat 1 g 7 %
Monounsaturated Fat 3 g
Polyunsaturated Fat 3 g
Trans Fat 0 g
Cholesterol 0 mg 0 %
Sodium 332 mg 14 %
Potassium 635 mg 18 %
Total Carbohydrate 54 g 18 %
Dietary Fiber 5 g 20 %
Sugars 3 g
Protein 13 g 25 %
Vitamin A 1 %
Vitamin C 80 %
Calcium 28 %
Iron 18 %
* The Percent Daily Values are based on a 2,000 calorie diet, so your values may change depending on your calorie needs. The values here may not be 100% accurate because the recipes have not been professionally evaluated nor have they been evaluated by the U.S. FDA.


Vegan chocolate cream pie – HOLIDAY SERIES


Oh what are the holidays or special family dinners without dessert? I tried my hand at a no-bake pie this winter and it turned out magically.

No ovens, small mess to clean up and a delicious result.

Best of all? No crappy processed ingredients.
Ingredients: 

Crust: 

2 -2.5 cups CREAMY CHEWY dates. If they are not creamy/chewy/soft – you must soak!


1 cup walnuts

1 cup crumbled honey wafers

4 tbsp cacao powder

1/8 cup melted Earth Balance

Salt to taste

1/4 cup warm water set aside

Filling: 

2 cups cashews, unsalted, raw. Soak if you wish.

3/4 cup scented coconut oil

2 cans light coconut milk

2 cups melted carob chips

1/2 cup liquid sweetener ie: stevia/agave

Juice of 1 large lemon

Salt to taste

Other: 

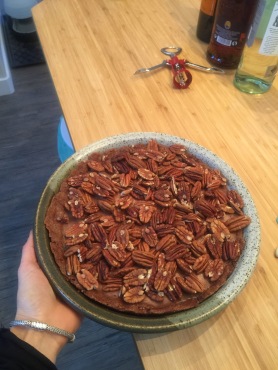
Pecan halves to decorate

Method: 

Process dates, walnuts and wafers from crust ingredients. Once mixed add remainder of ingredients and pulse. *TIP*: Add drops of warm water to mixture if it is not blending well. Should resemble a play-doh “ish” ball when fully mixed.

You should now have a loose ball of “dough” to line a pie plate with. Ensure you come up the sides of the pie plate like an authentic thick crust so that your filling is held in nicely! Place in fridge to chill.

In blender place all filling ingredients and mix for a couple of minutes or until smooth.

Pour into pie filling, top with pecan halves.

If you have less time, place the pie in the freezer for a couple of hours. If you’re not in a rush, refrigerate for at least 4-6 hours.

I left mine in over night to really set up.

You’ll only need to pop this out of the fridge for about 2 minutes to be able to cut into slices.

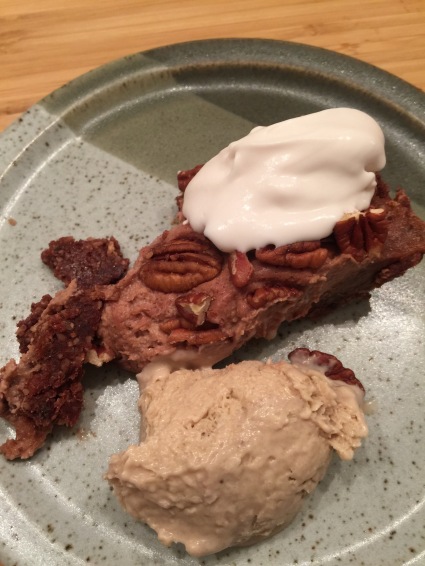
I served mine with a scoop of Peanut Butter and Banana Nice Cream and Coconut Whip!


Vegan coconut cream – HOLIDAY SERIES


I swear you will never make regular whipped cream again. This recipe is SO simple and really works. I’ve used a few recipes as inspiration but have managed to cut the fat content down without any issue so I thought it would be a PERFECT time to share this one with you all.

Minimal ingredients, maximum flavour.

Ingredients: 

3 cans low(er) fat coconut milk

1 tsp Vanilla extract – my homemade recipe HERE

1 cup icing sugar

3/4 cup cornstarch or tapioca flour

Method: 

DAY 1: You will need to separate and chill the coconut milk in the fridge over night. Empty the contents of three cans into a deep bowl and ensure you do not tip it over/move it too much or the cream & oil will get mixed up.

DAY 2: Chill a mixing bowl in the freezer and bring out your hand mixer! You can also use a traditional beater. The hand mixer worked famously.

Next, you will need to skim the coconut milk from the top into your chilled bowl. My milk didn’t really harden up too much and because it wasn’t full fat, there wasn’t much to separate at all! You’ll notice the oil poking through if you go too deep into the liquid.

Start beating/blending the cream until it starts to become creamy. Without FULL FAT cream this took me about 1.5-2 minutes. You will start to notice it will peak (as in the picture above) just like traditional cream.

Next, add vanilla extract and continue to beat for 30 seconds. Next, add your icing sugar and mix until smooth.

At this point, if you are noticing that your mixture is not creamy enough, start adding tapioca flour or cornstarch 1 teaspoon at a time and continue to mix until you reach the right consistency.

You can use this right away or refrigerate for use later. This stores easily for 1 week…maybe 2.

I topped my chocolate pie with this – deeeeelish.

Peanut butter & Banana Nice Cream – HOLIDAY SERIES


This picture is actually a little teaser for my chocolate pie…..but I really didn’t get a good snapshot of my ice cream. Quickest recipe you’ll make in your life, so there’s no excuse for dairy or yucky cheap ice cream anymore!

Love PB? Love Bananas? You’re done for.

Ingredients:

3 cans coconut milk

1 cup peanut butter *smooth

3 large bananas

2 tbsp agave nectar or sweetener of choice

1/2 tbsp vanilla extract

Method:

Blend all ingredients in blender, pour in bowl/vessel and freeze.

Allow to sit on counter to thaw for 5-10 minutes before serving.

OH MY GOOD LORD HOLD ON TO YOUR HATS.

Serve with pie, or on it’s own or in a banana split…my god, serve it on my abs and call it a day!

Vegan Irish Cream – Holiday Series

Rarely do I make desserts or work with alcohol (unless it’s for a tincture or homemade extracts) but this month we decided to have our family holiday dinner early so that we wouldn’t miss out while we are in Panama.

My family does not celebrate Christmas, though, not for religious reasons. We are atheists and really don’t celebrate any holidays. Our tradition is to go away each year at this time to spend a week or so together making memories on (usually) the beach. No store bought gifts, just the gift of our company and time.

This year, under the Christmas fern (there is a fern we threw some things under this year to appease Jeff’s family – we had a good laugh) this year were three lovely mason jars of delight as pictured above. Last minute I decided that I was in the spirit (he he) of giving my time and energy to something delicious and seasonally appreciated – Irish Cream!

This recipe takes no time at all, really no skill and is environmentally and animal friendly.

The only hitch is that you have to use quite a bit especially if you like to see your coffee turn white because this isn’t made with heavy cream. I’d say a 50/50 ratio is good!

I’ve included the nutritional information as well as traditional Irish Cream nutritional info so that you can see the difference for yourselves!

Ingredients:

3 cans light coconut milk

1.5 cups espresso/dark coffee

1.5 cups Jameson’s Irish Whisky

3/4 cup natural organic sugar. ( I used brown cane this time)

Method:

On stove top bring coconut milk to a light boil stirring often.

Reduce heat to simmer and add sugar. Continue to stir often for about 10-12 minutes or until the liquid has thickened some. You will be able to tell by feel when you are stirring.

Remove from heat and add whiskey and espresso or coffee and mix well.

This can be stored in a sealed jar for a week in the fridge. If you can this – it will last far longer. I made 2 litres of the stuff with this recipe.

Yummmmmy.

Nutritional Information: 

*Calories come from saturated fats, nearly 90%*

Vegan Irish Cream : Roughly 65 calories per oz

Traditional Irish Cream:  From 130-147 calories per oz


Apple Cinnamon Oatmeal

Regardless of how much time I have on my hands there are certain things that I WILL NOT eat out of a package. One of them is oatmeal. Quick oats give every reason for the human race to slow down and make their own damn oatmeal…here’s an inspiring recipe to bring whole food cooking back into your kitchen.

Make the time to go wild with fruits that you love!

Ingredients: 

1/2 cup quick oats & 1.5 cups hot water

1 tbsp flax seed

1/2 tsp aromatic coconut oil

1 Fuji apple – 3/4 diced 1/4 sliced for garnish

1/2 tsp cinnamon

1/2 cup nut milk of choice (this was low-cal almond & coconut 35 cals per cup)

Maple syrup or agave nectar to drizzle only

Method: 

On stove top bring all ingredients (other than milk & syrup) to a quick boil. Reduce to low heat and simmer for 2-3 minutes.

In microwave heat all ingredients other than milk and syrup for 1 minute, stir and heat for 30 seconds more.

Add milk (add this in the heating process if you like hot milk) and garnish with apples and drizzle syrup.

Makes one serving under 300 calories.

Epsom Salt – Natural moisturizing / hand & body wash

So long late night soaks!

So long late night soaks!

Now that I am done with my regular soaks for competition I have all of this unscented (and putrid scented) Epsom salt I need to get rid of.

The best way (other than bathing in that is) is to create harmless household and body cleaners!

Here is a simple recipe for you to start out with. I like the coconut/vanilla/bergamot combo below, but feel free to try your own. Use as a general moisturizer or wet your body and lather/scrub then rinse!

Ingredients: 

2 tbsp scented or unscented Epsom Salts

1 cup cup scented liquid coconut oil – deep conditioner, vitamin E – even works as a makeup remover!

5 drops vanilla essential oil – aphrodisiac and anti-depressant

2 drops bergamot essential oil – speed healing oil, treats anxiety

Method: 

Heat coconut oil on stove-top on very low heat until melted.

Add remaining ingredients and stir until salt is disintegrated.

Pour liquid into jar and allow to cool.

Keep stored in a room temperature and dark space until needed.

More info on Epsom Salts: 

CLICK HERE FOR A GREAT LINK ON EPSOM SALTS.