Becoming Little Miss Bikini – Season 2, Episode 2 – Stay Inspired


10 weeks out & feeling firm, fit and rested.


As everyone is aware, this season I’ve decided to go all out. In more ways than one. I’m doing at least 5 shows this year which will be demanding and probably drive me right nuts…I’m also working on a new fitness product which will have me traveling and attending seminars for R&D, we have had to fire up a new Engineering Services company to survive the oil downturn, our traveling budget has been sliced next to nil so I will be looking to run teaching vacations to get us out of town whenever I can AND I’ve applied for a grant for a 12 month mentorship program to re-energize my training business by attempting to infuse this new fitness product into it.

Oh ya, did I mention I’m running my second 90 day transformation in 6 months and we have a couple of inventions on the back burner that we need to find time to look at feasibility studies for? Am I/are we nuts? Yes. Do we have heaps of time? No. Am I still going to give it 110% while I still have 110% to give? There’s only one answer.

This week will be 10 weeks out until my first show. I’ve managed to make a few surprising back gains and am feeling really great. 4 weeks off bulking mode and I’m still not tired or hungry or too irritable.

Fasted cardio in the morning starts this  week, also adding more exercise in to blow up my shoulder area…cardio PM and I’ve changed up my ab routine because I’d really like to bring in a bit more defined musculature for Spring/Fall ’16.

Practicing Flexing

I’ve decided on a suit colour for this year – and I’m keeping lucky green as a back up for sure! Can you guess which one I’ve chosen? I’ve also decided on a jewel pattern that I think will look stunning….going to try out some new connectors as well.


All this and I’m still trying to stay in the kitchen and develop new and interesting recipes for my lifestyle, clients and the kids I teach a nutrition series for at Earl Grey School in Calgary monthly.  This month we completed our sugar unit, last month was Salt, next month is Eating in Season ~ kids are pretty inspiring.

This go around is going to take a lot of inspiration. A lot of digging deep and more mental preparedness than the last. Holding fast while the storm beats you down….yep, I’m ready for it.

IMG_6985

Anastacia & I working out a new recipe for sugar free vegan cookies – it bombed, 3 times. Master baker I am not.

I am excited for Spring Break as well as we have managed to (on points and searching for deals for weeks) find a cheap as hell family vacation to Cancun for 10 days at a hotel with a full gym AND kids club. It seems like while the Oil Gods are raining down hellfire and damnation the Adventure Gods are showering us with the gift of travel once again. Something I couldn’t live without and will never give up. Be sure to stay close to see how I made out during the trip ~ my coach will be altering my plan for the equipment I have access to.

I suppose I feel like this time around I really have a burning sense to remember that you only live once and there are so many excuses you can make for not leaving the house or getting out of your pajamas, but there is a giant world to see and so many positive changes to make that I can’t see how folks waste theirs in front of a TV or not doing anything.

My point here being, if you’re considering doing something that you feel is drastic, that you have no time for and are just all out overwhelmed – do it any way. There are enough hours in the day.

Replace the mantra “I don’t have time” with “I haven’t made that a priority in my life” and see how motivated you feel.

Today is rest day and I am going to go for a beautiful hike in the mountains with my family, feed your soul and you’ll find all the time you need for everything you truly need in your life.


xxoo

S


Baked Curried Cauliflower

I love cauliflower, I love the taste and versatility it contains. While the gas isn’t a highlight, it’s well worth the punishment when you get a recipe right.

I FINALLY got this one down and once baked you can’t help but devour it all. I suggest DOUBLING this recipe right off the bat as Jeff and I ate this whole dish to ourselves.

You’ll only need one measly mixing bowl and a few ingredients to blow your own mind here – I said it.

Ingredients: 

1 medium head of cauliflower washed and broken down into large florets.

1.5 tbsp of veganaise

1/4 cup coconut flour

1/4 tsp curry powder

1/4 tsp onion powder

1/4 tsp garlic powder

1/4 tsp turmeric

2 tbsp chopped fresh flat leaf italian parsley

2 tbsp chopped chive or green onion (green parts only)

1 tbsp chopped fresh cilantro

Salt & Pepper to taste

**add Cayenne if you love heat!!!!!

Method:

Preheat your oven to 400 degrees – please make sure it’s a true 400!!

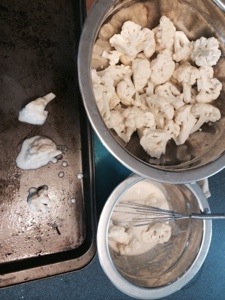
Next cauliflower in all ingredients but fresh herbs. It should look a little something like this:

Place on a baking sheet and bake for 18 minutes then turn and bake for 19 more.

Transfer to mixing bowl, dust with salt, pepper and add fresh herbs. Toss and serve hot!

I find this dish to be delish on its own however, you could try my lime infused aioli or  my sriracha aioli for dipping/drizzle.

Watermelon salad

image

I threw this recipe together in a matter of minutes armed with the challenge to continue eating six to seven 2-300 calorie meals per day in preparation for a fitness competition. Somehow, I forgot to take a snapshot…so I had some fun with this classic guy.

This recipe  is a compilation of all remnants from my fridge and I hope you enjoy it!

Ingredients: 

J100 g fresh Watermelon

100 g chopped Avocado

85 grams extra  firm Tofu chopped – toast this in a pan or leave raw ( I left raw in this recipe)

Optional – 15g crumbled Boursin garlic cheese

30g toasted pumpkin seeds

.5 tbsp Mint leaves chopped

1/2 tsp balsamic vinegar

Method: 

On stove-top lightly toast pumpkin seeds until browned.

Chop all ingredients and layer watermelon, avocado and tofu. Top with remaining ingredients and serve.

Warning – works out FAR better if you layer rather than try to toss everything – I tried both ways and layering is definitely the way to go for flavour and presentation.

Nutritional Info: 

537 Calories

41.2 gms fat

23.9 carbs

23.9 Protein

100 cal bean burgers 

Still learning how to create delish 2-300 calorie meals over here. accompanying these burgers in the photo are 100 g Brussels Sprouts and 50g baked (no oil) yam fries. Filling indeed. I served these to myself with a dash of Dijon mustard on the burgers – not too bad!

My food processor broke down so I ended up forming these (and they did NOT stick well) in a 1/3 measure scoop, then baking in the oven for too long…should you use a food processor (please do) this recipe will turn out really well.

Ingredients: 

1 can  organic black beans

1 can organic kidney beans

2.5 cups Quinoa cooked

200g yellow onion chopped (approx 1 medium)

1/4 tsp herbamare

2 medium brown eggs

Method: 

Combine all ingredients in food processor until mixed well. Scoop into 1/3 cup serving sizes for cooking.

Pan fry over medium heat for about 2/5 minutes each side.

Nutritional info: 

196 Calories (per two)

3.2 g fat

32.1g carbs

10.5g protein


Chocolate Chip cookies

IMG_2904.JPG


Me and cookies were never a thing, but after finding a pretty decent recipe and tweaking it…we just might be on like donkey kong.

Simple, quick and delicate. If you’re a fan of chocolate chip cookies, you’ll thank me for working this one out.

Fact: they were bagged up to take to the kids at Anastacia’s school before I could get a picture…then Jeff ate a bunch….so you’ll have to use your imagination here.

Ingredients: 

2 cups flour (gluten free flour is ok here, I used coconut flour)

1/2 cup raw coconut oil (I use the flavoured variety and just a bit over)

1 cup raw turbinado sugar

1/4 cup coconut milk

1 tbsp homemade vanilla extract

1 tsp baking soda

1 tsp baking powder

1/4 tsp Himalayan sea salt

1 & 1/2 cups carob chips or vegan chocolate chips or regular

Method:

Preheat oven to 350. I used 365 in my 3rd and 4th batches which worked out better.

Mix coconut oil and brown sugar (do not soften coconut oil prior to mixing).

Add nut milk and vanilla extract.

By now your mix should be a bit watery because of the coconut oil. This is alright unless you have soup on your hands…then add a smidgen more flour at the end of the next step.

Mix all dry ingredients together then add to wet ingredients. Your mix should be crumby but tacky…if it’s still too wet, add a bit more flour here.

Roll into balls, make for 10 minutes checking on them often. They spread out quite a bit so don’t try to place too many on one sheet.

I placed all my cookie sheets outside in the 0 degree temps for 20 minutes after to cool them down quickly.

These freeze amazingly.

Made just over 30 cookies.

IMG_2905.JPG

Adapted from a daily Rebecca recipe. 

Truffle hashbrowns & frittata

IMG_2398.JPG


To me, weekends mean hand ground coffee pressed, The Beatles White album and a breakfast that takes an hour to create. All the little things creating the perfect atmosphere for a meditative culinary journey. Exciting, aromatic, trans-formative. Good morning Saturday, I’ve been waiting for you.

Ingredients:

Hashbrowns

6 medium yukon gold potatoes ( I had to use russets here which worked out ok, yukons are far superior)

1/2 tsp white truffle oil

1/2 tsp Rosemary salt (try my homemade recipe HERE)

Light spray of avocado oil

Frittata

6 medium eggs

2 green onions diced

1/2 red pepper diced

1/2 cup shredded cheese/daiya cheese product

1/2 medium tomato diced – fresh

Method:

Preheat oven to 350 degrees

Cube potatoes & parboil for 8-10 minutes or until easily pierced with a fork. Rinse under cold water, transfer to bowl and add truffle oil and salt, coat well. Place on cookie sheet lightly coated with avocado oil. Bake uncovered for 20 minutes, remove from oven and flip, bake for an additional 20 minutes. Remove from oven & set aside so you can bring in your frittata.

Meanwhile, preheat cast iron pan on stove top to medium heat. Whisk eggs and add onions and peppers. Pour into pan and allow to cook on stove top for 10-12 minutes. Remove from heat and transfer to baking rack in oven, bake for 5 more minutes.

Remove pan, change setting to broil.

Add back hashbrowns and broil to brown for 3-5 minutes watching regularly. Remove hashbrowns and place frittata under broiler for 3 minutes or until cheese is melted and a little browned.

Remove all from oven, plate and serve with freshly cracked pepper, rosemary salt and fresh tomatoes. Opt for Louisiana hot sauce or ketchup too.


Serves 4 adults.


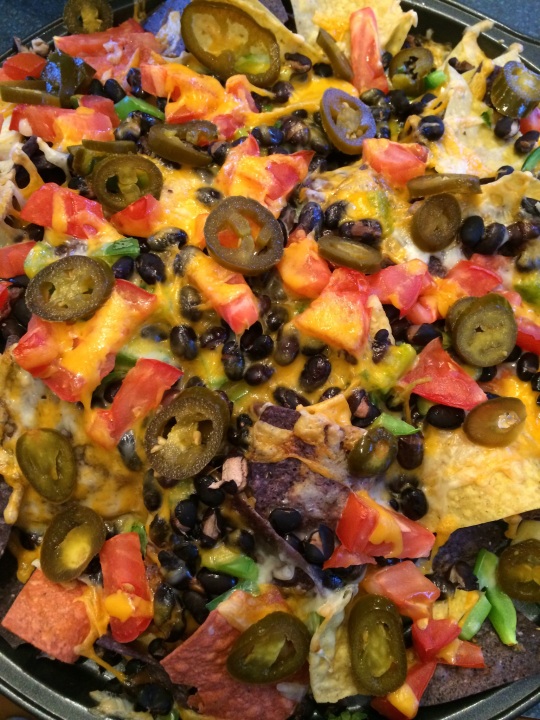
Best ever vegetarian nachos

IMG_2238.JPG


Alright, so Nachos aren’t the most difficult thing on earth to create – this I know. In my world, GOOD “chos” however, need to be grease-free, hot, not too cheesy and full of nutrition. Here’s how you get some good protein and vitamins into a yummy snack. I’ll be honest. The day I made these it was lunch!


Ingredients:

1/2 bag organic corn tortilla chips

1/2 cup mozzarella cheese shredded

1/2 cup old cheddar cheese shredded

(*sub in DAIYA for real cheese!*)

1/2 green pepper diced

1 medium tomato diced

1/2 red onion diced

1/3 cup pickled jalapeno peppers

1 can organic black beans

Method:

Preheat oven to 350 degrees.

Layer ingredients on baking as follows:

Handful chips, mix of 2 cheeses, handful of beans, sprinkling of red onion, sprinkling of green pepper, sprinkling of tomato. Repeat twice.

Place in oven and bake for 15 minutes or until cheese is melted.

Switch to broil for 5 minutes to brown cheese.


Serves 3-4 adults.


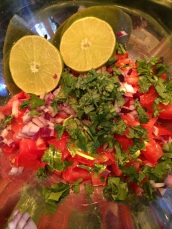
Serve with HOMEMADE Guacamole and Salsa! Links below:


IMG_2236.JPG

IMG_2237.JPG

Cauliflower Buffalo Wings

20140627-184909.jpg

At Coachella this year I had some of the most KILLER (albeit deepfried) Cauliflower buffalo “wings”. Since then I have been on the hunt for the perfect replica, sans deep fry. In my meat eating days, I could down 3-4 dozen hot wings in a sitting. I know, puke, however I still crave that crispy hot saucyness regularly.

This is the best I have been able to do so far. I adapted it from a recipe I found online and now for whatever reason cannot find again!!! I will post the original link when I can find it again.

This one needs work, but should be better than passable if you follow these directions……..still trying to find the perfect substitute.

Ingredients:

1 head cauliflower

1/3 cup melted vegan butter – or real butter if you please

1 cup Franks hot sauce

1/4 tsp salt

1/4 tsp garlic powder

1 cup water

1/2 cup brown RICE flower only – I have read this tip several times so I went with it.

Method:

Set oven to 450 ( a true 450) I set mine to 460…..

For your breading: Place all dry ingredients in bowl, whisk in water. Whatever you do, make sure that when you mix the water and flour, the mixture is SUPER gooey and sticks to the cauliflower. Mine was WAY too runny (per the recipe) so I added more flour to this recipe…but use your best judgement and add flour if you need to.

20140627-184835.jpg

For your sauce: Melt butter and mix with Franks. That’s it.


20140627-184859.jpg

Dip bite-sized cauliflower into breading mix. Add to baking sheet, bake for 20 minutes. Rotate and bake 10 more minutes. Check that browning is happening, if not continue to cook until you see browning. Make it THICK this was NOT good:

20140627-184844.jpg

Add Franks mixture and cook for 10 more minutes.

Allow to cool to room temperature – do NOT be afraid to crisp these up. All ovens are different so you need to keep an eye on this well. I will update with a surefire recipe as soon as I can!

Raw Vegan mushroom burgers with cashew cheese

I have to say that this recipe is by far, one of the easiest and most tasty for raw vegan fare. This makes it completely approachable and very rewarding. 
A few tips before you start: 
Be sure that you start this recipe with a few hours to spare for marinating and dehydrating!! Nothing worse than getting stoked to make something only to realize there is a time crunch that will leave your meal tasting less than stellar. 
Do not over salt your mushrooms and make sure that they are nice and plump so they don’t turn into hard disks in the process. 
Most of all, have fun and treat your body well.
Ingredients:
Burger
4 portobello mushroom caps
2.5 tbsp grape seed oil
2 tbsp namashoyu or low sodium soy sauce
Dress with lettuce, tomato, sauerkraut, kale or whatever else comes to mind. 
Method: 
Clean off mushrooms and remove stem. Mix oil and soy sauce in bowl, coat mushroom caps & continue to stir every 30 minutes or so for a few hours to coat and marinate. 
Place mushrooms in dehydrator on live food setting and dehydrate for 3-4 hours. You can opt for oven baking at it’s lowest temperature if you do not have a dehydrator. 
Remove from dehydrator & put together all toppings and cheese to serve as a burger. 
Enjoy quickly and while still warm for best flavour. 
Serves 2. 

Vegan/Vegetarian chickpea curry with naan

Indian food. A million flavours, colours and places rolled into (at times) one dish. I’ve had a love affair with Indian food since for at least the last 15 years. 
Moving to Calgary has meant giving up A LOT of my old familiar favourites ~ and sadly, after 2 years here, I can find no honest to goodness replacement for some of them. 
So, unwilling to suffer any food loss, I take control of the situation and roll out some pretty damn good Vegan/Vegetarian curry – WITH homemade Naan bread, my first try and definitely NOT my last. 
This meal was amazing. I can’t wait to go to India. 
Ingredients: 
Garlic Naan – if going gluten free skip Naan or use GF flour
1 tsp dry yeast
2 tsp sugar
2 cups organic all purpose flour
1 tsp Himalayan sea salt
1/8 tsp baking powder
3 tbsp vegan yogurt
2 tbsp olive oil
1 tsp fennel seed
5 tbsp melted butter or earth balance spread
6 cloves garlic pressed or diced
Method: 
In a large glass, dissolve dry yeast and 1 teaspoon sugar with 3/4 cup warm water. Let it sit on your counter until it’s frothy, about 10 minutes.
Meanwhile, sift the flour, salt, remaining 1 teaspoon of sugar and baking powder into a large, deep bowl.
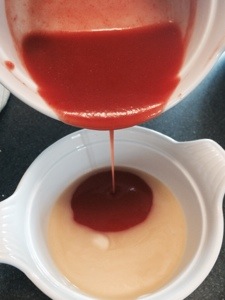
Once the yeast is frothy, add the yogurt and the olive oil into the glass, and stir to combine. Pour the yogurt mixture into the dry ingredients and add fennel seeds and gently mix the ingredients together with a fork. When the dough is about to come together, use your hands to mix. It will feel like there isn’t enough flour at first, but keep going until it transforms into a soft, slightly sticky and pliable dough. As soon as it comes together, stop kneading. Cover the dough with plastic wrap or a damp tea towel and let it sit for 1.5 to 2 hours. 
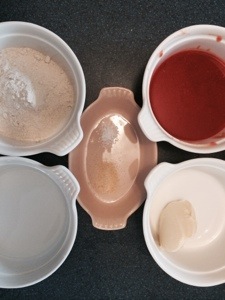
When you’re ready to roll, make sure you have two bowls on your counter: one with extra flour in it, and one with water. The dough will be extremely soft and sticky-this is good! Separate the dough into 6 equal portions and lightly roll each one in the bowl of extra flour to keep them from sticking to each other.
Shape the naan. Using a rolling pin, roll each piece of dough into a teardrop shape, narrower at the top than at the bottom. It should be 8 to 9-inches long, 4-inches wide at its widest point and about 1/4-inch thick. Once you’ve formed the general shape, you can also pick it up by one end and wiggle it; the dough’s own weight will stretch it out a little. Repeat this method with the rest of the dough. (If you’re making the gluten-free version, you’ll have better luck pressing the dough out with your fingertips, than rolling.)
Warm a large cast-iron skillet over high heat until it’s nearly smoking. Make sure you have a lid large enough to fit the skillet and have a bowl of melted butter at the ready.
Dampen your hands in the bowl of water and pick up one of your naans, flip-flopping it from one hand to the other to lightly dampen it. Gently lay it in the skillet and set your timer for 1 minute. The dough should start to bubble.
After about 1 minute, flip the naan. It should be blistered and somewhat blackened, don’t worry – that’s typical of traditional naan! Cover the skillet with the lid and cook 30 seconds to 1 minute more.
Remove the naan from the skillet, brush with a bit of butter **mixed with crushed garlic** and sprinkle with a little coarse sea salt. Place the naan in a tea towel-lined dish. Repeat with the rest of the naans and serve.
Cook’s Notes:
* If you would like to make this gluten-free, you can substitute in 2 1/4 cups of a gluten-free all-purpose flour mix for the regular flour, plus 1 1/4 teaspoons of xanthum gum.

Curry
Ingredients: 

5 yellow potatoes peeled or not, sliced or cubed
2 tbsp olive oil
1 large yellow onion sliced and diced
1 can of chickpeas or equivalent thereof of fresh/dried & re hydrated
1 cup vegan cream or real cream
5 large chopped and pureed tomatoes
1 tsp sea salt
1 tsp cumin
2 inches fresh grated ginger OR 1 tsp powdered
1 tsp garam masala
2 tsp curry powder
6 cloves minced garlic
1-3 handfuls of washed & chopped cilantro
Method: 

Boil potatoes for 10 minutes or until tender. Drain, rinse and set aside. 
Heat oil in skillet cook onion & garlic until translucent. Stir in all spices and cook for one minute. 
Pour in blended tomatoes, cream and beans simmer for 10 minutes, allow to cook on low for 1-1.5 hours. No additional liquid should be necessary – very soupy. 
Top with sprinkle of chopped cilantro and serve with fresh HOT garlic naan. 
Serves 6, add basmati or jasmine rice if desired. 

Naan Adapted from Aarti Sequeira